

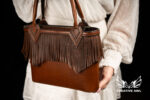


![Fringe handbag [PDF & DXF pattern]](https://creativeawl.com/wp-content/uploads/2025/06/WWW-scaled.jpg)


Fringe handbag [PDF & DXF pattern]


You know what? This bag was my nemesis for a long time. Seriously. Those fringes… I thought I’d go crazy before figuring out how to plan them properly. But now, looking at the finished design, I can’t help but smile.
Fringe Handbag – because sometimes you want to feel that boho vibe
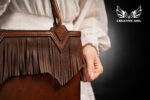
Remember playing cowboys and Indians as a kid? Well, this bag has that vibe – only in a grown-up, classy version. Fringe that dances with every step, geometric details on top (which by the way look like little works of art), and that satisfaction when someone asks where you got this beauty.
What’s inside this pattern:
- PDF in two formats (A4 and Letter) – everything nicely laid out
- DXF file if you have a cutting machine
- Video tutorial where I show step by step (including how not to lose your mind with the fringe)
- Materials list – no guessing games
How much leather you’ll need: About 0.4 square meters(4.6 sqft) of thicker leather (2mm) for the body plus some thinner (1.4~mm) for the fringe. 0.8mm waxed thread and standard hardware.
Honestly? This isn’t a one-afternoon project. But it’s not as scary as it might seem either. The biggest challenge is patience when cutting the fringe (I recommend a good series in the background). The rest is pure joy – watching pieces of leather transform into something that looks straight out of a boutique.
The best part is that each bag turns out a bit different. Depends on how the fringe falls, how you do the contrast stitching, what leather you choose. It’s the kind of project that lets you show your own style.
If you’re looking for something that’ll be your “signature piece” – you know, that one thing that always gets compliments – this might be it. Just warning you: get ready for “where did you get that?” at every turn.
And the answer “I made it myself” – priceless.
Only logged in customers who have purchased this product may leave a review.
Related Products

Oldschool Bag [PDF & DXF pattern]
Original price was: $11.45.$8.59Current price is: $8.59.
Duffle Bag [PDF & DXF pattern]
Original price was: $33.32.$24.99Current price is: $24.99.
Salvador Dali Mask [PDF & DXF pattern]
Original price was: $15.20.$11.40Current price is: $11.40.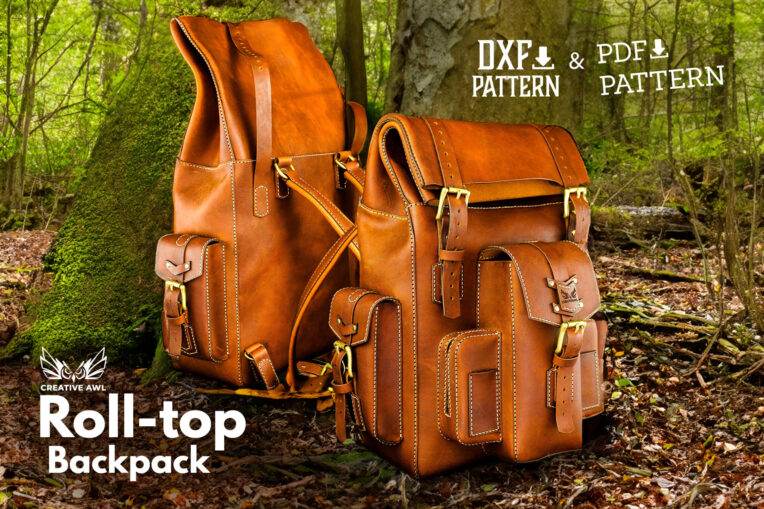
Roll-top Backpack [PDF & DXF pattern]
Original price was: $20.82.$15.62Current price is: $15.62.Recently Viewed Products
Reviews
There are no reviews yet.